
Not quite sure how to clean an infrared sauna the right way? Here’s a simple 3-step routine that keeps things quick, effective and low-fuss. This same method works great for traditional dry saunas as well.

Step 1. Prepare Your Sauna for Cleaning:
Start by turning off and unplugging your sauna, and give it time to cool completely. Once it’s no longer warm, gather your cleaning supplies. Keeping everything together in a small caddy, bucket or tub makes it easy to grab and go whenever it’s time for a quick clean.
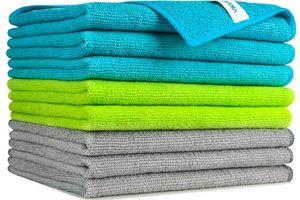
For most home saunas, all you need is a soft cloth, mild soap, white vinegar and water. These are gentle on the wood, non-abrasive, and still do a great job at cutting through sweat and surface grime.
I like using microfiber cloths because they soak up moisture quickly and grab onto dust, lint and residue really well. They’re inexpensive, reusable and hold up through a lot of washes.
Step 2. Clean the Inside of Your Sauna:
Next, mix a small amount of mild soap with warm water. Dip your cloth into the solution, wring it out thoroughly, and wipe down the benches, backrests and interior walls as needed. For the floor, you can use a separate cloth or a small mop dedicated to sauna use.
How Often Should You Clean a Home Sauna? As a general rule, aim to clean your personal sauna at least once a week. If you use it frequently or for longer sessions, cleaning after every couple of uses can be even better for keeping things fresh.
Regular cleaning keeps the interior looking good and helps limit bacteria buildup. In short, a simple wipe-down routine keeps the sauna more sanitary, extends the life of the wood and makes every session feel nicer. I’ve found that doing lighter, more frequent cleanings makes the job quicker and much less of a chore.

Note: Many portable home saunas are built from cedar or hemlock, and that’s intentional. Both woods naturally contain oils with mild antibacterial properties.
Those natural oils help slow down the growth of bacteria and other microorganisms. Even so, routine cleaning is still important for maintaining a hygienic, pleasant-smelling sauna environment.
Step 3. Safely Sanitize Your Sauna:
To finish, it’s time to sanitize. Mix a simple 50/50 solution of white vinegar and water. Using a clean cloth, wipe down the benches, backrests, door handle and any other areas that come into contact with skin. Afterward, prop the door open and let everything air dry completely.
The vinegar solution helps kill germs, lift sweat marks and remove light stains from the wood. It also neutralizes odors, so your sauna smells cleaner and fresher between sessions.
Note: I like vinegar because it’s inexpensive, effective and doesn’t come with the harsh fumes or chemicals that many commercial cleaners have. As a bonus, it also works wonderfully for cleaning windows and mirrors without streaks, so it’s a handy staple to keep around.


